


STYLES BY ANGELA
ABOUT ME
Hi, I'm Angela! Welcome to my portfolio!
Growing up, I've always been in love with all things creative and hands on. I started doing hair when I was pretty young, whether it was cutting my family's hair, cutting my own hair, or even coloring my hair (of course with the help of some YouTube videos)! I love all things beauty related but hair has always been something that has stuck out to me the most. It's always been a fun hobby of mine so I decided to turn it into my career!
I recently graduated from the hairstyling course at MC College and I'm looking for an apprenticeship opportunity where I can expand my hairstyling knowledge. I'm open to just about anything but I have a real passion and interest in advanced color placement and intricate haircuts. I think they’re both so fascinating! I would also like to someday take a course or two for both hair extensions and advanced color.
I am so excited to keep on learning and growing, not only as a hairstylist, but as a person, too. I hope that you’ll join me on my journey!

CLIENT WORK
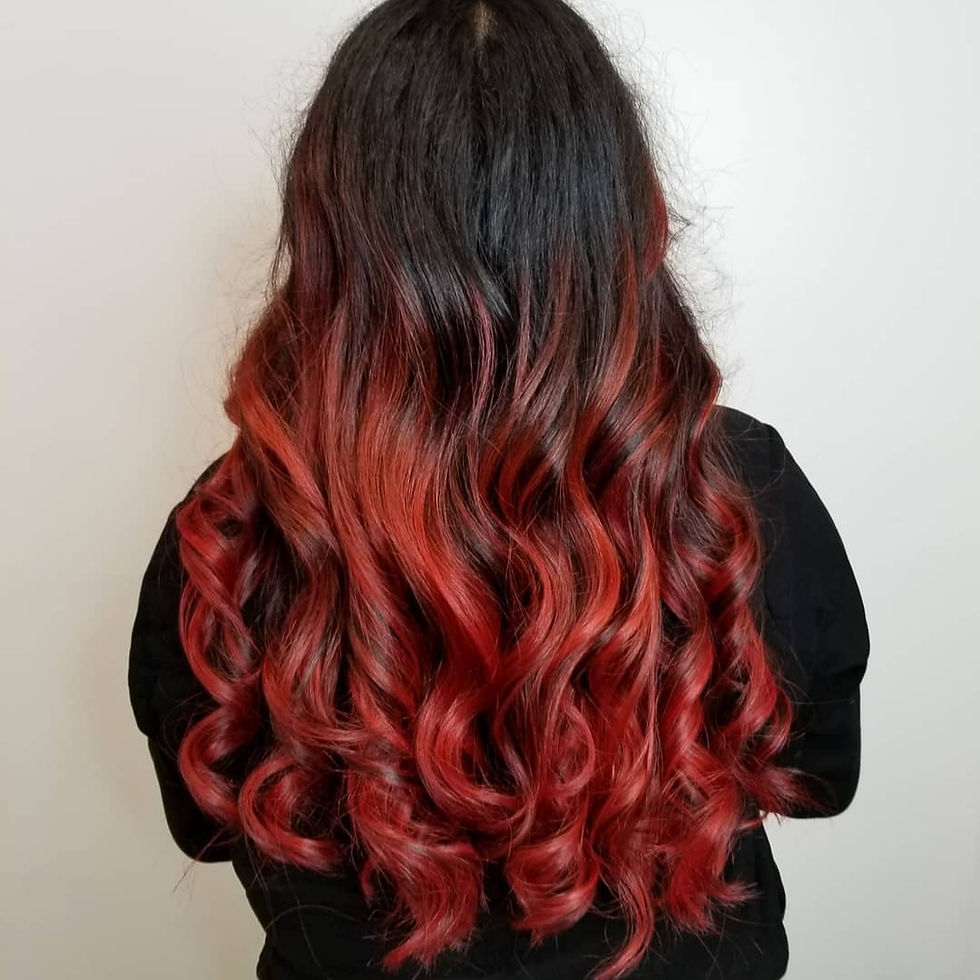
I lightened my client to a level 7, skipping a section every 2 foils. Then I used some purple shampoo to neutralize the yellow. To tone, I used 6F to give my client the beautiful red tone she wanted.
.jpg)
My client came in with pretty straight hair and wanted to give some life and body to it. I did a bricklay perm wrap using the orange perm rods and used a moisturizing alkaline perm solution. We also did a deep conditioning treatment to give her hair some TLC.
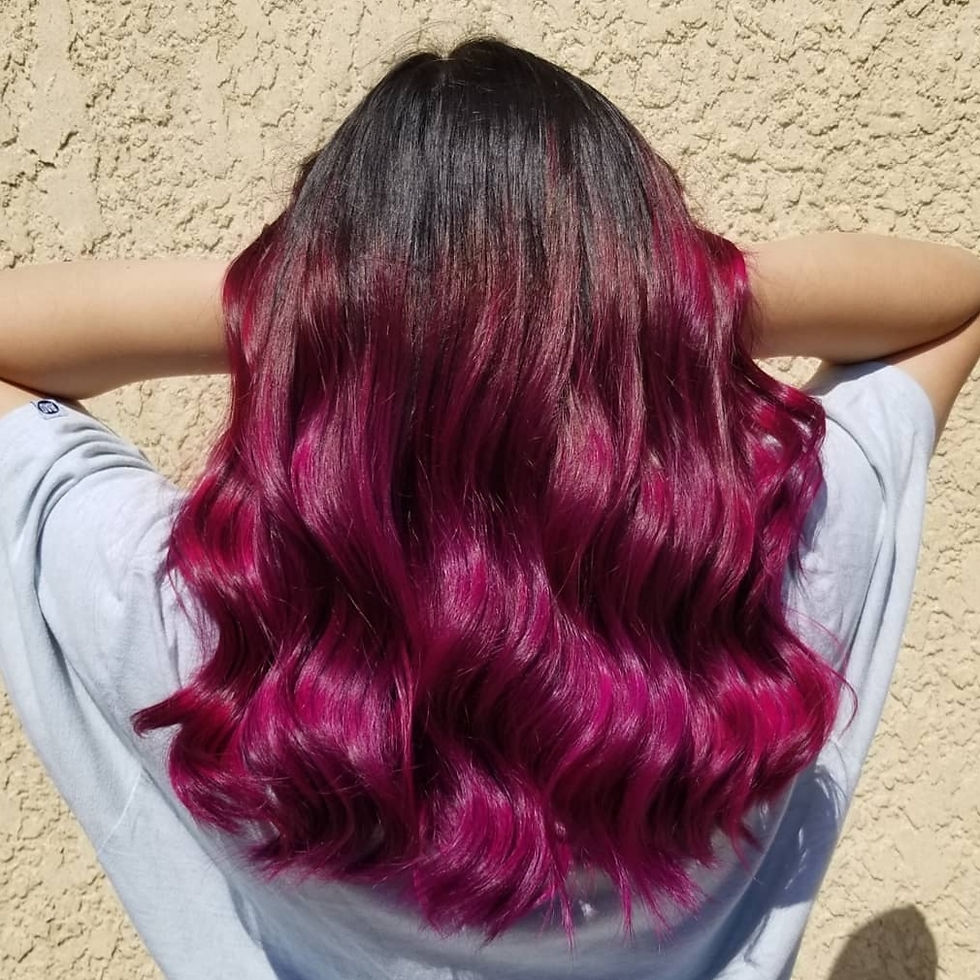
My client started out with a natural level 2 and I lightened her to a level 7. After, I used some purple shampoo to tone out some of the yellow tones. Then I went in an alternating pattern using a fuchsia and a purple semi permanent color.

My client was a warm level 8 and she wanted me to lighten her up! I used foils to lighten her hair to this level 10. I did a horizontal brick-lay pattern in the back sections and diagonal back sections in the front panels. I brought the lightener as close to the base as possible but I feathered it towards the base rather than completely getting rid of the base. I also back-combed every section to ensure that there would be a seamless blend. To tone I used lots of purple shampoo and allowed it to sit on the hair for about 15 minutes.
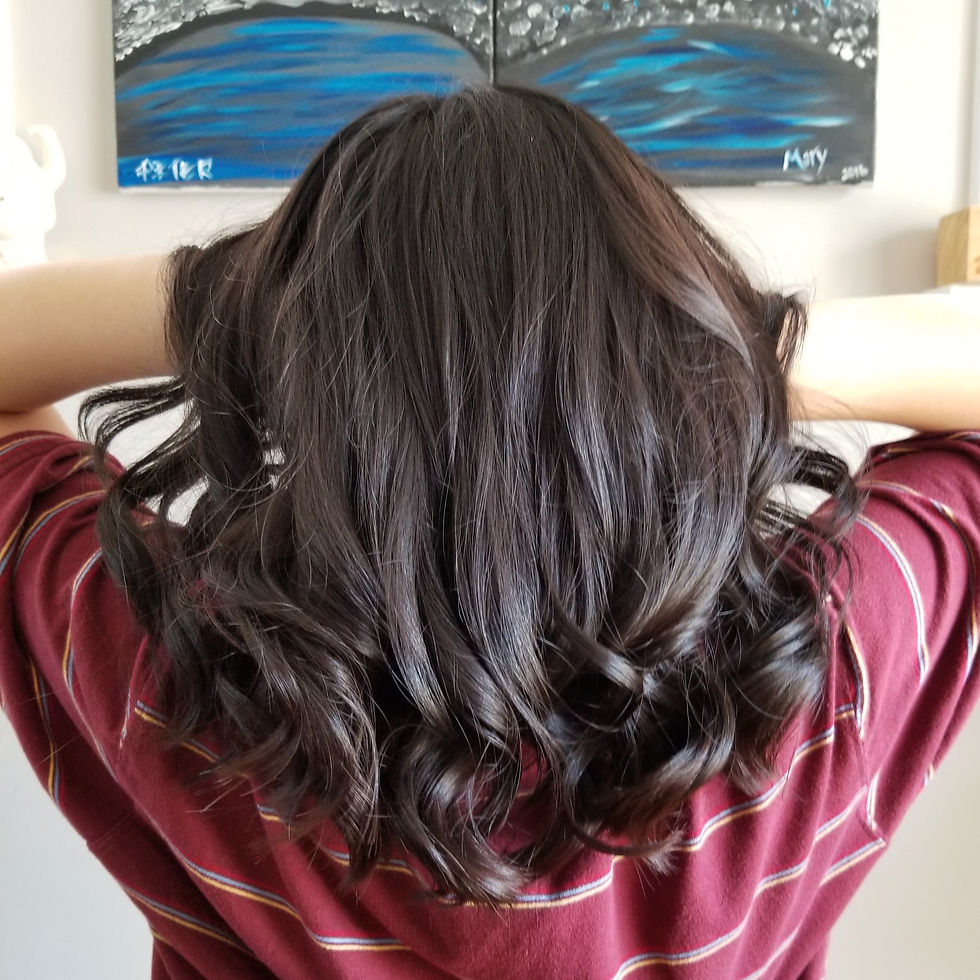
This haircut was quite the transformation! My client had her hair down past her waist and decided to get a big chop. I took horizontal sections and used a stationary guideline to create a solid line. I used my texturizing shears to minimize some of the weight in the solid form by point cutting. To style, I used a flat iron to create these beautiful waves.

My client wanted a solid form but she didn’t want a solid line in the back. Instead, we went with a diagonal back lob so that there’s a little more body to the hair, both when it’s down as pictured and when it’s in a ponytail. I created a stationary guideline and brought all my sections to that line. I did some end texturizing to lessen the weight at the perimeter line.

My client was in need of a haircut. I used clipper over comb to get rid of the bulk and shear over comb to refine the blend in the exterior. For the interior, I didn’t take too much off as my client wanted to grow his hair out. I simply blended the exterior and interior further.

My client came in with some existing highlights and lowlights and wanted to get a balayage. She was hoping this would be the first step in getting her to an overall brighter blonde. We used balayage powder to lighten the ends, using a brick-lay pattern in the back and diagonal back sections in the front panels. To tone, we used a diluted permanent ash colour to tone the previous highlights and the ends we just lightened. The existing highlights and lowlights aided in giving the hair some nice dimension.
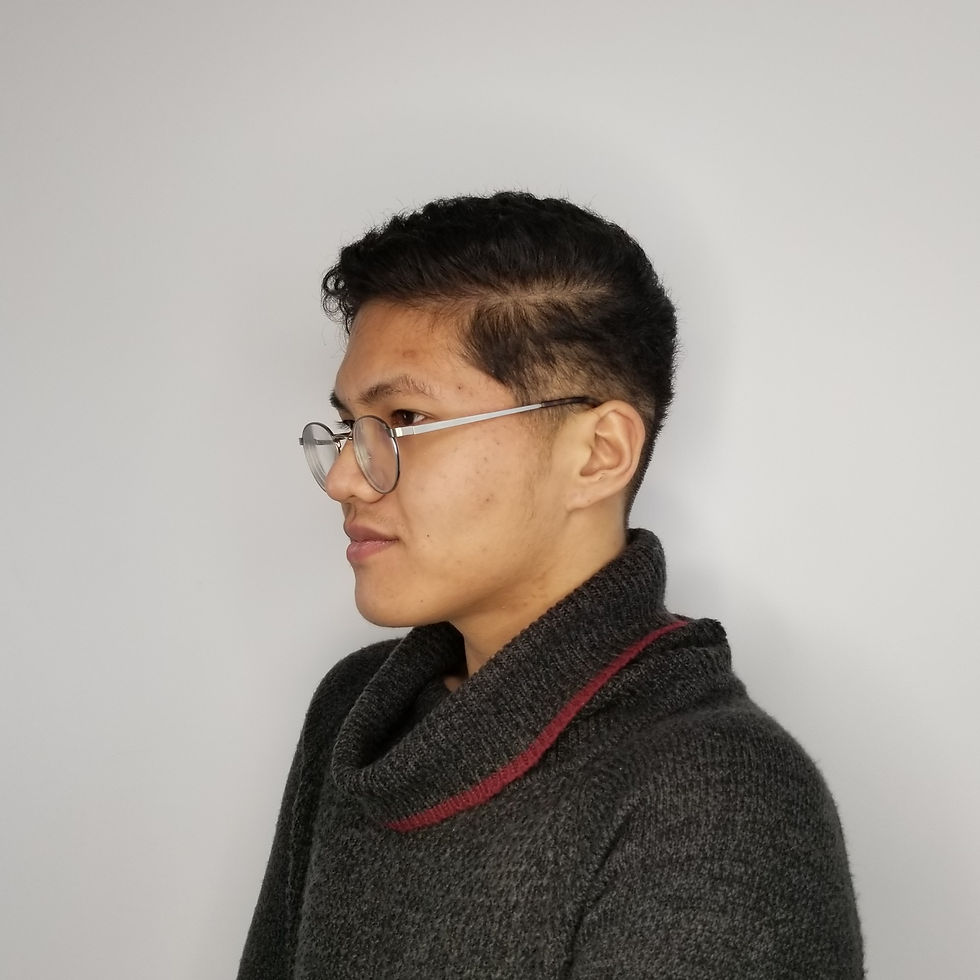
My client came in with naturally curly hair that had been growing out for quite some time. I used clipper over comb to get rid of the bulk and shear over comb to refine the blend in the exterior. For the interior, I did some planar sculpting , creating a disconnection on one side and blending the other side and the back. I used my texturizing shears to point cut mid-strand to ends to help his natural curl sit better.
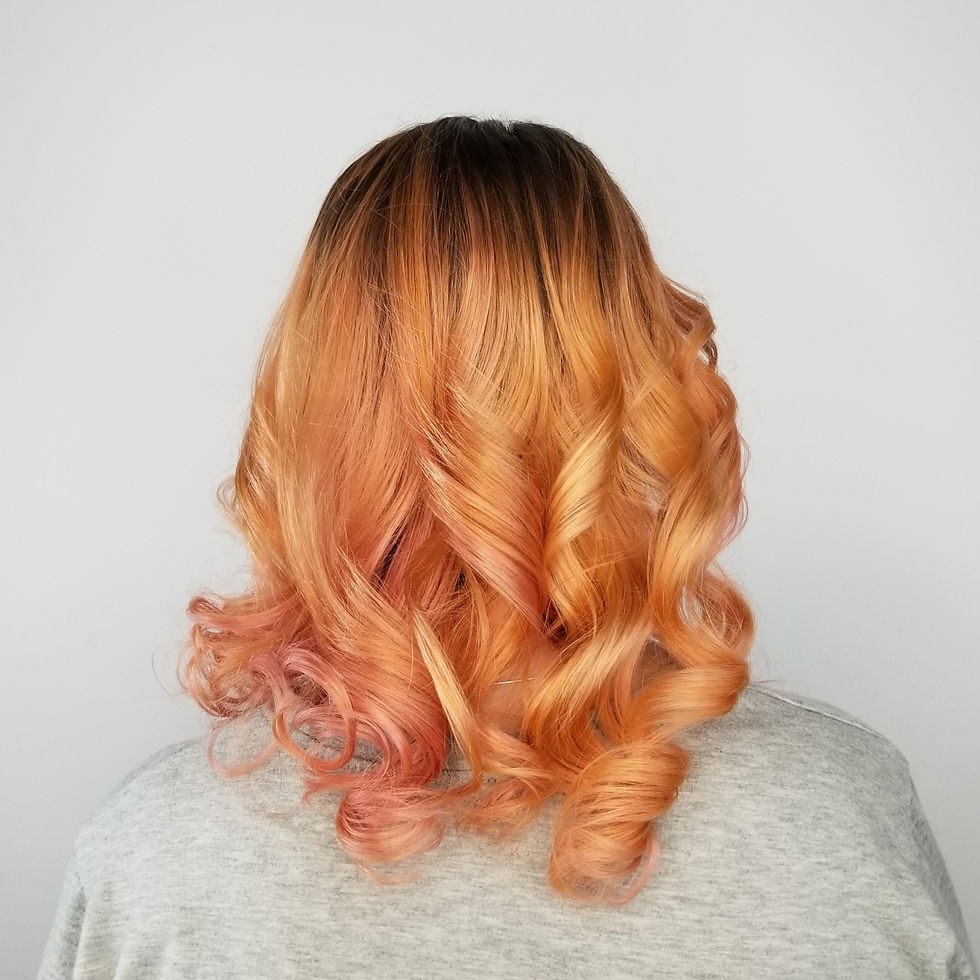
My client was sitting at a 6N which was lightened in foils to get her to a level 10. I backcombed each section and used a brick-lay pattern to get that beautiful blend that she wanted. We then toned her with 10NA and some silver for control. After, we went in with some semi-permanent pastel pink/rose gold colours and curled her hair with a marcel iron to get this beautiful finish!
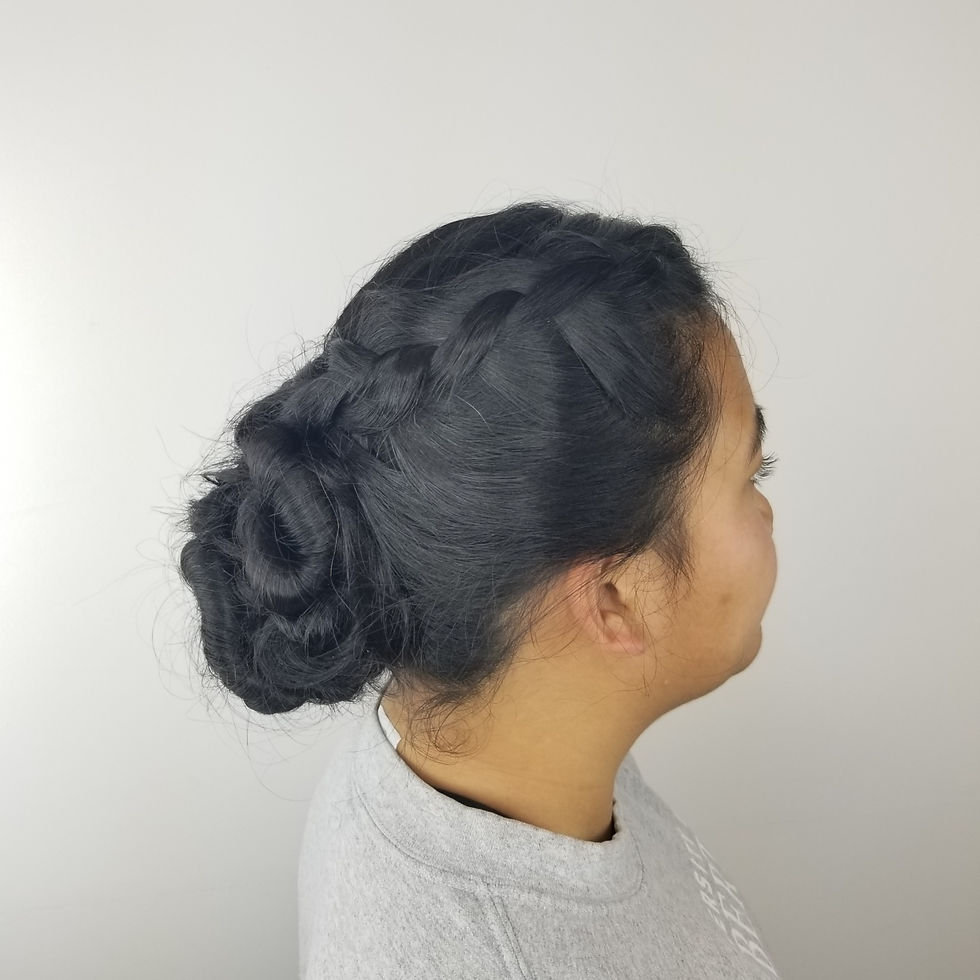
This updo consists of twists in the back and a Dutch braid that starts at the front hairline and wraps around the twists.
.jpg)
My client had naturally wavy, shoulder length hair. I gave her a uniform haircut before perming so that the end result would be tight curls with a round appearance. I used a brick-lay pattern throughout the head to give her these fun, bouncy curls.
MANNEQUIN WORK

This was my first attempt at victory rolls. I curled the hair with my marcel iron towards the top of the head and let it fully set. Then, I backcombed near the base to add some support for the rolls and smoothed the surface to create some sleek motion. For the faux finger waves, I also used my marcel iron. I twisted the hair while wrapping it around the iron and it created these lovely oblongs!

This updo consists of twists and braids. I backcombed some of the hair to create a filler for the braided bun. Then, I used some twists to add some texture in the crown area. For the last front section, I used some braids to add some motion that would lead your eye to the back of the head.

For this airform, I used a smaller round brush to create this “messy” hairstyle. I wrapped the hair around the round brush and rotated until I had done at least 2 revolutions. Then I gently released the hair from the round brush and let it fully cool down before combing it all out.

For this hairstyle, I used my flat iron to create these very soft waves. I took sections that were approximately two inches thick and one inch wide. I grabbed the section and created a “C” shape and used my flat iron to press it into the hair. Then would create a backwards “C” shape and continue down the rest of the hair.
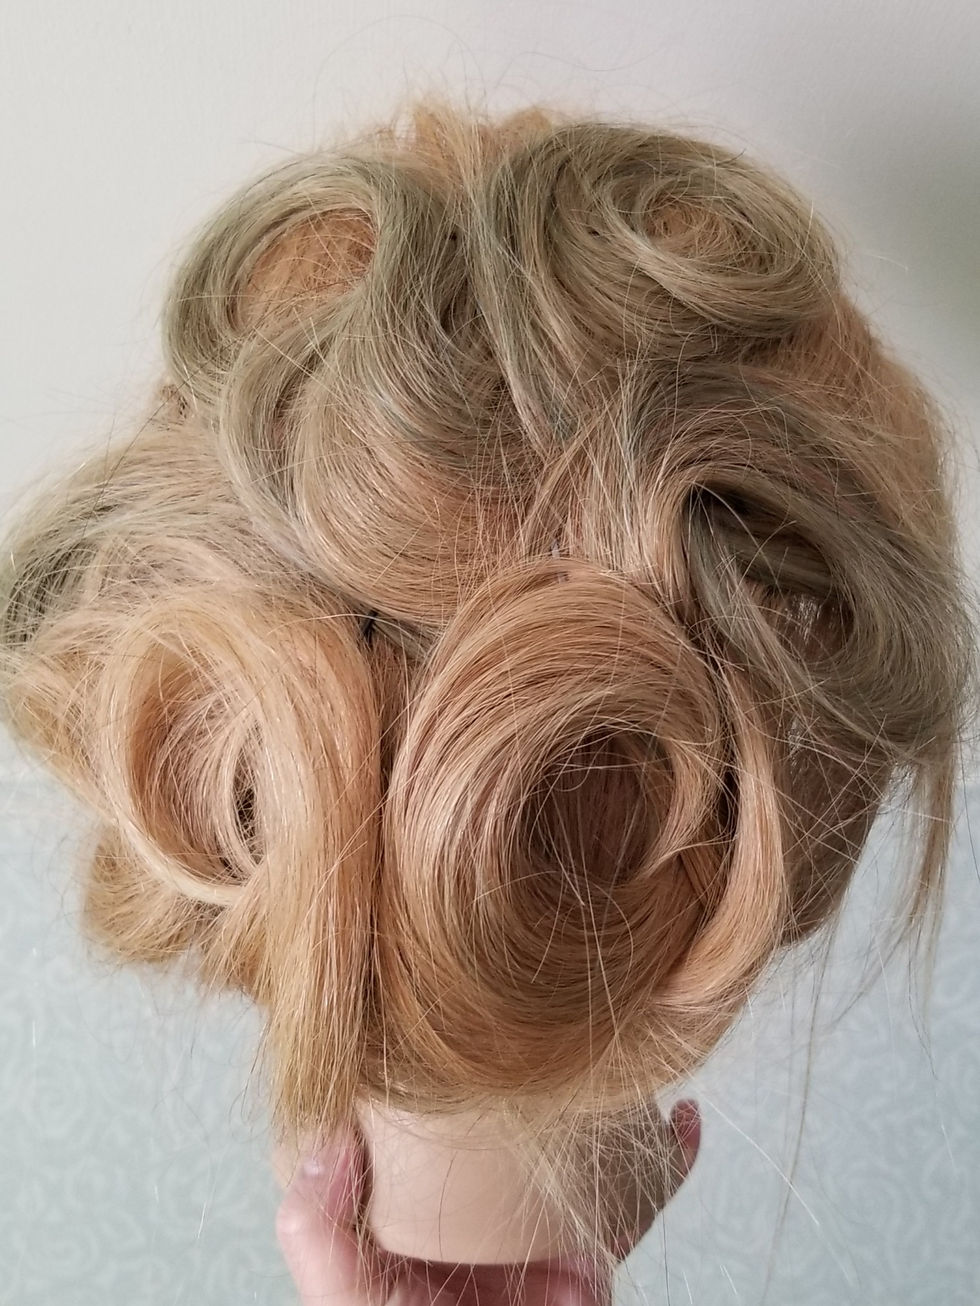
This was an avant garde updo that I created on the spot. I used a lot of backcombing so that I would have something to pin the curls to. Since this was done in quarantine, I didn’t have access to the materials I needed, so this updo was pinned with only five bobby pins.

This updo consists of twists, braids, and a filler. First, I created the twists that would add some textural interest. I pulled them apart slightly as I wanted this to be a “messier” updo while keeping it classy. Then, I pinned the hair in place. I wrapped the remaining lengths around the filler and pinned it to the head, making sure to keep it smooth since I wanted to add a bit of contrast from the rest of the updo. To finish it off, I used some braids from the front hairline that cascaded to the back to further hide the filler.
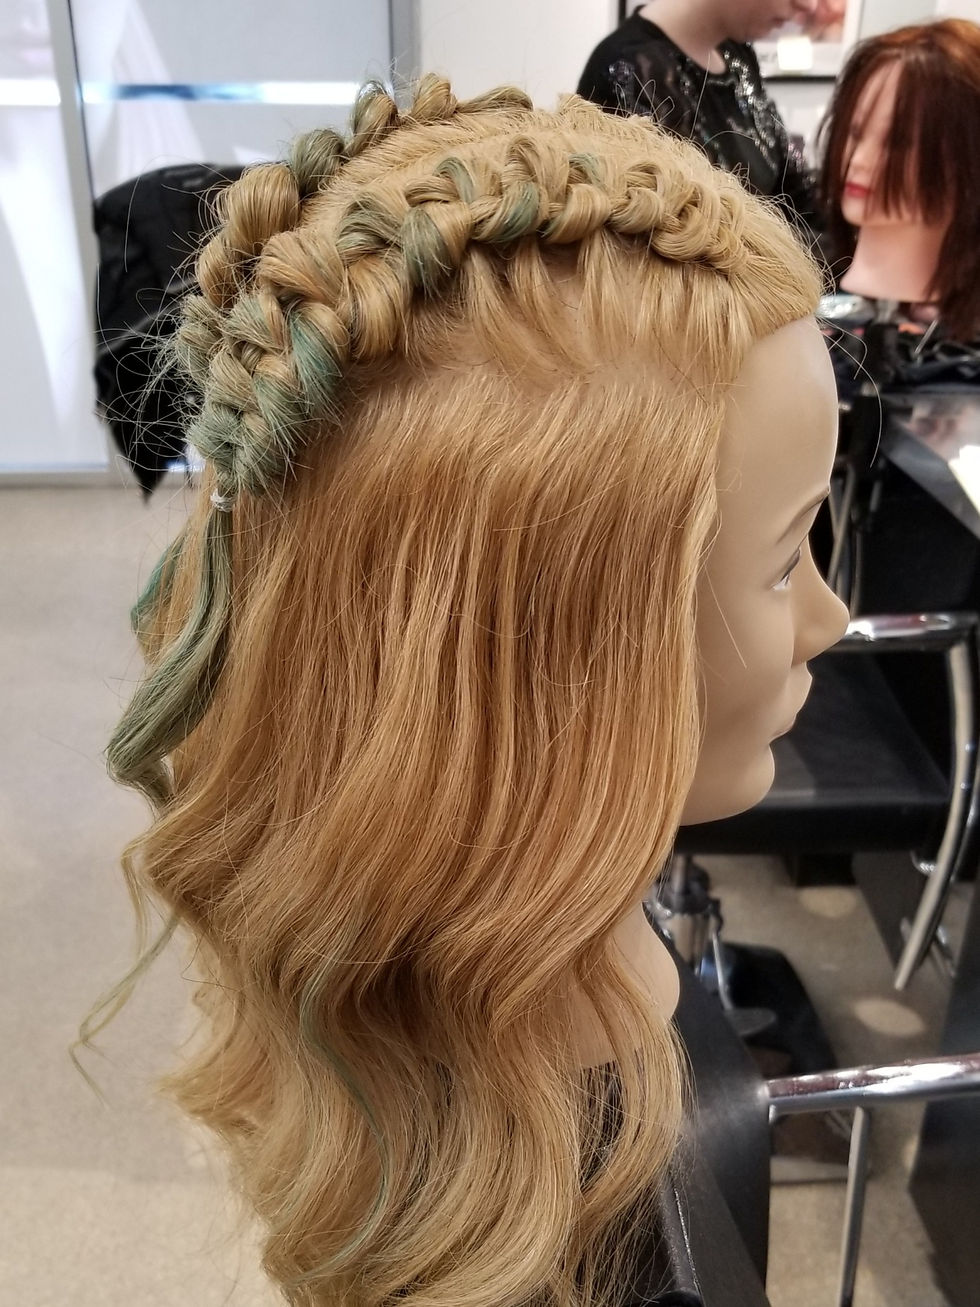
When I was creating this simple hairstyle, I was thinking about all these social media influencers going to festivals like Coachella and thought this would be a super cute look to wear. I used my marcel and created these subtle waves by twisting the hair while wrapping it around the iron. Then I decided to do two infinity braids on top to keep the hair out of the face.
